深入浅出PageRank算法
PageRank算法是谷歌曾经独步天下的“倚天剑”,该算法由Larry Page和Sergey Brin在斯坦福大学读研时发明的,论文点击下载: The PageRank Citation Ranking: Bringing Order to the Web。
本文首先通过一些参考文献引出问题,然后给出了PageRank的几种实现算法,最后将其推广至在MapReduce框架下如何实现PageRank算法。
PageRank的核心思想有2点:
1.如果一个网页被很多其他网页链接到的话说明这个网页比较重要,也就是pagerank值会相对较高;
2.如果一个pagerank值很高的网页链接到一个其他的网页,那么被链接到的网页的pagerank值会相应地因此而提高。
下面是一张来自WikiPedia的图,每个球代表一个网页,球的大小反应了网页的pagerank值的大小。指向网页B和网页E的链接很多,所以B和E的pagerank值较高,另外,虽然很少有网页指向C,但是最重要的网页B指向了C,所以C的pagerank值比E还要大。

参考内容:
2.Google 的秘密- PageRank 彻底解说 中文版
3.数值分析与算法 Page 161 应用实例:Google的PageRank算法
4.Numeric Methods with Matlab 或者中文翻译版本Matlab数值计算
5.使用 MapReduce 思想计算 PageRank Page 62 PageRank和马尔可夫链
1.问题背景
来自参考内容3

2.数学建模
来自参考内容3,理解网页连接矩阵$G$,马尔科夫过程("网上冲浪"),转移矩阵$A$,概率$p$为用户点击当前网页中的某个链接地址的概率(一般都为0.85)。


最后得到一个等式$Ax=x$,这实际上就是求矩阵$A$的特征值为1的特征向量!
下面的内容使用圆盘定理解释了1是矩阵$A$的主特征值,所以我们可以使用幂法来求解。
关于幂法的详细介绍参考另一篇文章Numerical Methods Using Matlab: 第三章 矩阵特征值和奇异值求解


3.求解PageRank
假设有如上图右侧所示的网页链接模型。
(1) 幂法
wiki上有一个PageRank的简便算法,它不考虑转移概率,而是采用的是迭代的方式,每次都更新所有网页的pagerank值,更新的方式就是将每个网页的pagerank值平摊分给它指向的所有网页,每个网页累计所有指向它的网页平摊给它的值作为它该回合的pagerank值,直到全部网页的pagerank值收敛了或者满足一定的阈值条件就停止。
后面的MapReduce框架下PageRank算法的实现就采用了这个思想。考虑转移概率的情况和这个算法类似,乘上一个转移概率再加上一个随机跳转的概率。

根据上面的思想,下面Matlab代码实现可以得到各个网页的PageRank值。
n=6;
i=[2 3 4 4 5 6 1 6 1];
j=[1 2 2 3 3 3 4 5 6];
G=sparse(i,j,1,n,n);

% Power method
for j = 1:n
   L{j} = find(G(:,j));
   c(j) = length(L{j});
end

p = .85;
delta = (1-p)/n;
x = ones(n,1)/n;
z = zeros(n,1);
cnt = 0;
while max(abs(x-z)) > .0001
   z = x;
   x = zeros(n,1);
   for j = 1:n
      if c(j) == 0
         x = x + z(j)/n;%转移到任意一个网页
      else
         x(L{j}) = x(L{j}) + z(j)/c(j);%将上次的pagerank值平摊给所有指向的网页
      end
   end
   x = p*x + delta;
   cnt = cnt+1;
end
得到的向量$x$保存了各个网页的pagerank值,虽然链接数目一样,但是网页①比网页④和网页⑤都高,而网页②的pagerank值第二高,因为网页①链接到了它上面,相当于沾了网页①的光。
x =
    0.2675
    0.2524
    0.1323
    0.1698
    0.0625
    0.1156
这篇文章给出该算法的一个Python版本实现,该博主使用第三方模块python-graph,python-graph模块实现了很多图算法,该模块的使用示例,使用前需要先安装,代码如下:
easy_install python-graph-core
easy_install python-graph-dot
Python版本的算法实现:
# coding=utf-8

# python-graph https://code.google.com/p/python-graph/

# Import graphviz
import graphviz as gv

# Import pygraph
from pygraph.classes.digraph import digraph
from pygraph.readwrite.dot import write

# Define pagerank function
def pagerank(graph, damping_factor=0.85, max_iterations=100, \
             min_delta=0.00001):
    """
    Compute and return the PageRank in an directed graph.

    @type  graph: digraph
    @param graph: Digraph.

    @type  damping_factor: number
    @param damping_factor: PageRank dumping factor.

    @type  max_iterations: number
    @param max_iterations: Maximum number of iterations.

    @type  min_delta: number
    @param min_delta: Smallest variation required for a new iteration.

    @rtype:  Dict
    @return: Dict containing all the nodes PageRank.
    """

    nodes = graph.nodes()
    graph_size = len(nodes)
    if graph_size == 0:
        return {}
    # value for nodes without inbound links
    min_value = (1.0-damping_factor)/graph_size

    # itialize the page rank dict with 1/N for all nodes
    #pagerank = dict.fromkeys(nodes, 1.0/graph_size)
    pagerank = dict.fromkeys(nodes, 1.0)

    for i in range(max_iterations):
        diff = 0 #total difference compared to last iteraction
        # computes each node PageRank based on inbound links
        for node in nodes:
            rank = min_value
            for referring_page in graph.incidents(node):
                rank += damping_factor * pagerank[referring_page] / \
                        len(graph.neighbors(referring_page))

            diff += abs(pagerank[node] - rank)
            pagerank[node] = rank

        print 'This is NO.%s iteration' % (i+1)
        print pagerank
        print ''

        #stop if PageRank has converged
        if diff < min_delta:
            break

    return pagerank

# Graph creation
gr = digraph()

# Add nodes and edges
gr.add_nodes(["1","2","3","4"])

gr.add_edge(("1","2"))
gr.add_edge(("1","3"))
gr.add_edge(("1","4"))
gr.add_edge(("2","3"))
gr.add_edge(("2","4"))
gr.add_edge(("3","4"))
gr.add_edge(("4","2"))

# Draw as PNG
# dot = write(gr)
# gvv = gv.readstring(dot)
# gv.layout(gvv,'dot')
# gv.render(gvv,'png','Model.png')

pagerank(gr)
经过32次迭代之后得到的结果如下,和前面的结果一致:
This is NO.32 iteration
{'1': 0.2675338708706491, '3': 0.13227261904986046, '2': 0.2524037902400518, '5': 0.062477242064127136, '4': 0.1697488529161491, '6': 0.1155828978186352}
(2) 利用马尔可夫矩阵的特殊结构
来自参考内容4,其中$\delta=\frac{1-p}{n}$

也就是将矩阵$A$进行分解,并不需要显示求出矩阵$A$,然后便是求解一个线性方程组即可。
function x = pagerank1(G)
% PAGERANK1  Google's PageRank modified version 1 - hujiawei

%if nargin < 3, p = .85; end
p=0.85;

% Eliminate any self-referential links

G = G - diag(diag(G));

% c = out-degree, r = in-degree

[n,n] = size(G);
c = sum(G,1);%each row's sum
r = sum(G,2);%each col's sum

% Scale column sums to be 1 (or 0 where there are no out links).

k = find(c~=0);
D = sparse(k,k,1./c(k),n,n);

% Solve (I - p*G*D)*x = e

e = ones(n,1);
I = speye(n,n);
x = (I - p*G*D)\e;

% Normalize so that sum(x) == 1.

x = x/sum(x);
(3) 巧妙解法:逆迭代算法
巧妙利用Matlab中的精度误差导致原本是一个奇异矩阵的$I-A$变成一个非奇异矩阵,运行时只是会有些警告提示,但是运行结果和其他算法一样。

function x = pagerank2(G)
% PAGERANK1  Google's PageRank modified version 2 - hujiawei
% using inverse iteration method

%if nargin < 3, p = .85; end
p=0.85;

% Eliminate any self-referential links

G = G - diag(diag(G));

% c = out-degree, r = in-degree

[n,n] = size(G);
c = sum(G,1);%each row's sum
r = sum(G,2);%each col's sum

% Scale column sums to be 1 (or 0 where there are no out links).

k = find(c~=0);
D = sparse(k,k,1./c(k),n,n);

% Solve (I - p*G*D)*x = e

e = ones(n,1);
I = speye(n,n);
% x = (I - p*G*D)\e;
delta=(1-p)/n;
A=p*G*D+delta;
x=(I-A)\e;

% Normalize so that sum(x) == 1.

x = x/sum(x);
最后,附上参考内容4中给出的一份好代码,用于模拟随机冲浪生成矩阵$G$的代码
function [U,G] = surfer(root,n)
% SURFER  Create the adjacency graph of a portion of the Web.
%    [U,G] = surfer(root,n) starts at the URL root and follows
%    Web links until it forms an adjacency graph with n nodes.
%    U = a cell array of n strings, the URLs of the nodes.
%    G = an n-by-n sparse matrix with G(i,j)=1 if node j is linked to node i.
%
%    Example:  [U,G] = surfer('http://www.harvard.edu',500);
%    See also PAGERANK.
%
%    This function currently has two defects.  (1) The algorithm for
%    finding links is naive.  We just look for the string 'http:'.
%    (2) An attempt to read from a URL that is accessible, but very slow,
%    might take an unacceptably long time to complete.  In some cases,
%    it may be necessary to have the operating system terminate MATLAB.
%    Key words from such URLs can be added to the skip list in surfer.m.

% Initialize

clf
shg
set(gcf,'doublebuffer','on')
axis([0 n 0 n])
axis square
axis ij
box on
set(gca,'position',[.12 .20 .78 .78])
uicontrol('style','frame','units','normal','position',[.01 .09 .98 .07]);
uicontrol('style','frame','units','normal','position',[.01 .01 .98 .07]);
t1 = uicontrol('style','text','units','normal','position',[.02 .10 .94 .04], ...
   'horiz','left');
t2 = uicontrol('style','text','units','normal','position',[.02 .02 .94 .04], ...
   'horiz','left');
slow = uicontrol('style','toggle','units','normal', ...
   'position',[.01 .24 .07 .05],'string','slow','value',0);
quit = uicontrol('style','toggle','units','normal', ...
   'position',[.01 .17 .07 .05],'string','quit','value',0);

U = cell(n,1);
hash = zeros(n,1);
G = logical(sparse(n,n));
m = 1;
U{m} = root;
hash(m) = hashfun(root);

j = 1;
while j < n & get(quit,'value') == 0

   % Try to open a page.

   try
      set(t1,'string',sprintf('%5d %s',j,U{j}))
      set(t2,'string','');
      drawnow
      page = urlread(U{j});
   catch
      set(t1,'string',sprintf('fail: %5d %s',j,U{j}))
      drawnow
      continue
   end
   if get(slow,'value')
      pause(.25)
   end

   % Follow the links from the open page.

   for f = findstr('http:',page);

      % A link starts with 'http:' and ends with the next quote.

      e = min([findstr('"',page(f:end)) findstr('''',page(f:end))]);
      if isempty(e), continue, end
      url = deblank(page(f:f+e-2));
      url(url<' ') = '!';   % Nonprintable characters
      if url(end) == '/', url(end) = []; end

      % Look for links that should be skipped.

      skips = {'.gif','.jpg','.pdf','.css','lmscadsi','cybernet', ...
               'search.cgi','.ram','www.w3.org', ...
               'scripts','netscape','shockwave','webex','fansonly'};
      skip = any(url=='!') | any(url=='?');
      k = 0;
      while ~skip & (k < length(skips))
         k = k+1;
         skip = ~isempty(findstr(url,skips{k}));
      end
      if skip
         if isempty(findstr(url,'.gif')) & isempty(findstr(url,'.jpg'))
            set(t2,'string',sprintf('skip: %s',url))
            drawnow
            if get(slow,'value')
               pause(.25)
            end
         end
         continue
      end

      % Check if page is already in url list.

      i = 0;
      for k = find(hash(1:m) == hashfun(url))';
         if isequal(U{k},url)
            i = k;
            break
         end
      end

      % Add a new url to the graph there if are fewer than n.

      if (i == 0) & (m < n)
         m = m+1;
         U{m} = url;
         hash(m) = hashfun(url);
         i = m;
      end

      % Add a new link.

      if i > 0
         G(i,j) = 1;
         set(t2,'string',sprintf('%5d %s',i,url))
         line(j,i,'marker','.','markersize',6)
         drawnow
         if get(slow,'value')
            pause(.25)
         end
      end
   end

   j = j+1;
end
delete(t1)
delete(t2)
delete(slow)
set(quit,'string','close','callback','close(gcf)','value',0)

%------------------------

function h = hashfun(url)
% Almost unique numeric hash code for pages already visited.
h = length(url) + 1024*sum(url);
4.MapReduce框架下PageRank算法的实现
利用前面wiki上的迭代(或者幂法)的思想来实现MapReduce框架下PageRank算法很简单,可以先阅读下参考内容5。
这篇文章using-mapreduce-to-compute-pagerank更加详细,可以参考
以下是我的大数据的一次作业,要求是参考wiki上的简便算法,实现MapReduce框架下的PageRank算法。给的数据集是Twitter的用户之间的关系,可以看做是网页之间的关系,但是助教没要求写代码以及运行这个数据集(有1G多),所以下面只是一个Python版本的理想可行版本,并没有通过实际大数据集的验证,另外,博主暂时还不太会Python的mapreduce框架中的一些函数,所以实现的是一个简明的可以测试的PageRank算法。
1.输入输出格式
map函数的输入是<节点,从该节点引出的边列表>,其中节点是一个类,包含了其当前的pagerank值,输出是<节点,反向节点pagerank值/反向节点引出边的总数>;
reduce函数的输入是<节点,反向节点pagerank值/反向节点引出边的总数>,输出是<节点,从该节点引出的边列表>,其中节点包含了其更新后的pagerank值。
伪代码: [一时犯二写了个英文形式的 ]
process the data to the form of {node i:[its adjacent node list],...}
while the sum of difference between the last two pagerank values < threshold
    map({node i:[its adjacent node list],...}):
        map_output={}
        for every node j in adjacent node list:
            put or sum up {j:(i, PageRank(i)/length(adjacent node list))} into map_output
        return map_output

    reduce(map_output):
        reduce_output={}
        for every entry {j:(i, PageRank(i)/length(adjacent node list))} in map_output:
            put or sum up all values pagerank values for node j with its adjacent node list into reduce_output
        return reduce_output
2.示例演示
假设用户1,2,3,4是如下图所示的关系:

假设有2个mapper(A和B)和1个reducer(C),初始时4个节点的pagerank值都是0.25
其中,关于用户1和2的数据被mapperA读取并处理,关于用户3和4的数据被mapperB读取并处理 [经验证,即使一个用户的数据是由不同的mapper来读取的,最终收敛到的结果差不多]
map的输入输出结果如下:

reduce的输入输出结果如下,输入是2个mapper的输出,输出的结果中更新了节点的pagerank值

reducer处理完了之后又将它的结果输入给mapper处理,直到迭代的次数超过了设定值或者两次迭代之后得到的所有节点的pagerank值之差的总和(也可以是取二范数)小于设定的阈值。
3.示例的实验结果
(1)首先是使用Matlab采用幂法的方式计算出在p=1.0的情况下示例得到的结果 [它的主要作用是验证后面python版本的正确性]
matlab源码如下:
n=4;
i=[2 3 4 3 4 4 1 2];
j=[1 1 1 2 2 3 3 4];
G=sparse(i,j,1,n,n);

[n,n] = size(G);
for j = 1:n
   L{j} = find(G(:,j));
   c(j) = length(L{j});
end

% Power method
p=1.0;
delta = (1-p)/n;
x = ones(n,1)/n;
z = zeros(n,1);
cnt = 0;
while max(abs(x-z)) > .0001
   z = x;
   x = zeros(n,1);
   for j = 1:n
      if c(j) == 0
         x = x + z(j)/n;
      else
         x(L{j}) = x(L{j}) + z(j)/c(j);
      end
   end
   x = p*x + delta;
   cnt = cnt+1;
end
sprintf('pagerank result:')
x
结果为:
0.1072
0.3571
0.2143
0.3214
(2)matlab版本的page rank没有采用mapreduce的思想进行迭代,所以我另外写了一个python版本的利用mapreduce思想实现的pagerank算法(注:我并没有使用python的map和reduce函数去实现,而是使用更加容易明白的实现),使用的阈值为0.0001,最多迭代的次数为100次。
# coding=utf-8

__author__ = 'hujiawei'
__doc__ = 'pagerank mapreduce'

class Node:
    def __init__(self,id,pk):
        self.id=id
        self.pk=pk

def pk_map(map_input):
    map_output={}
    for node,outlinks in map_input.items():
        for link in outlinks:
            size=len(outlinks)
            if link in map_output:
                map_output[link]+=(float)(node.pk)/size
            else:
                map_output[link]=(float)(node.pk)/size
    return map_output

def pk_reduce(reduce_input):
    for result in reduce_input:
        for node,value in result.items():
            node.pk+=value

def pk_clear(nodes):
    for node in nodes:
        node.pk=0

def pk_last(nodes):
    lastnodes=[]
    for node in nodes:
        lastnodes.append(Node(node.id,node.pk))
    return lastnodes

def pk_diff(nodes,lastnodes):
    diff=0
    for i in range(len(nodes)):
        print('node pk %f, last node pk %f ' % (nodes[i].pk, lastnodes[i].pk))
        diff+=abs(nodes[i].pk-lastnodes[i].pk)
    return diff

def pk_test1():
    node1 = Node(1, 0.25)
    node2 = Node(2, 0.25)
    node3 = Node(3, 0.25)
    node4 = Node(4, 0.25)
    nodes = [node1, node2, node3, node4]
    threshold = 0.0001
    max_iters = 100

    for iter_count in range(max_iters):
        iter_count += 1
        lastnodes=pk_last(nodes)
        print('============ map count %d =================' % (iter_count))
        in1 = {node1: [node2, node3, node4], node2: [node3, node4]}
        in2 = {node3: [node1, node4], node4: [node2]}

        mapout1 = pk_map(in1)
        mapout2 = pk_map(in2)

        for node, value in mapout1.items():
            print str(node.id) + ' ' + str(value)

        for node, value in mapout2.items():
            print str(node.id) + ' ' + str(value)

        print('============ reduce count %d =================' % (iter_count))

        reducein = [mapout1, mapout2]
        pk_clear(nodes)
        pk_reduce(reducein)

        for node in nodes:
            print str(node.id) + ' ' + str(node.pk)

        diff=pk_diff(nodes,lastnodes)
        if diff < threshold:
            break

if __name__ == '__main__':
    pk_test1()
得到的结果为如下,总共迭代了15次
1 0.107138774577
2 0.35712924859
3 0.214296601128
4 0.321435375705
上面的结果和Matlab用幂法得到的pagerank值差别很小,可以认为是正确的,所以说明了使用这种mapreduce输入输出格式的正确性。
OK,差不多了,希望对需要理解PageRank算法的人有帮助! 🙂
linux下详解ftp的常用功能
一、简介:
FTP(File Transfer Protocol, FTP)是TCP/IP网络上两台计算机传送文件的协议,FTP是在TCP/IP网络和INTERNET上最早使用的协议之一,它属于网络协议组的应用层。FTP客户机可以给服务器发出命令来下载文件,上载文件,创建或改变服务器上的目录。
 概述:
概述:
FTP是应用层的协议,它基于传输层,为用户服务,它们负责进行文件的传输。FTP是一个8位的客户端-服务器协议,能操作任何类型的文件而不需要进一步处理,就像MIME或Unencode一样。但是,FTP有着极高的延时,这意味着,从开始请求到第一次接收需求数据之间的时间会非常长,并且不时的必需执行一些冗长的登陆进程。

FTP服务一般运行在20和21两个端口。端口20用于在客户端和服务器之间传输数据流,而端口21用于传输控制流,并且是命令通向ftp服务器的进口。当数据通过数据流传输时,控制流处于空闲状态。而当控制流空闲很长时间后,客户端的防火墙会将其会话置为超时,这样当大量数据通过防火墙时,会产生一些问题。此时,虽然文件可以成功的传输,但因为控制会话会被防火墙断开,传输会产生一些错误。
主动和被动模式
FTP有两种使用模式:主动和被动。主动模式要求客户端和服务器端同时打开并且监听一个端口以建立连接。在这种情况下,客户端由于安装了防火墙会产生一些问题。所以,创立了被动模式。被动模式只要求服务器端产生一个监听相应端口的进程,这样就可以绕过客户端安装了防火墙的问题。
一个主动模式的FTP连接建立要遵循以下步骤:
1.客户端打开一个随机的端口(端口号大于1024,在这里,我们称它为x),同时一个FTP进程连接至服务器的21号命令端口。此时,源端口为随机端口x,在客户端,远程端口为21,在服务器。
2.客户端开始监听端口(x+1),同时向服务器发送一个端口命令(通过服务器的21号命令端口),此命令告诉服务器客户端正在监听的端口号并且已准备好从此端口接收数据。这个端口就是我们所知的数据端口。
3.服务器打开20号源端口并且建立和客户端数据端口的连接。此时,源端口为20,远程数据端口为(x+1)。
4.客户端通过本地的数据端口建立一个和服务器20号端口的连接,然后向服务器发送一个应答,告诉服务器它已经建立好了一个连接。
被动模式FTP:
为了解决服务器发起到客户的连接的问题,人们开发了一种不同的FTP连接方式。这就是所谓的被动方式,或者叫做PASV,当客户端通知服务器它处于被动模式时才启用。
在被动方式FTP中,命令连接和数据连接都由客户端发起,这样就可以解决从服务器到客户端的数据端口的入方向连接被防火墙过滤掉的问题。
当开启一个 FTP连接时,客户端打开两个任意的非特权本地端口(N > 1024和N+1)。第一个端口连接服务器的21端口,但与主动方式的FTP不同,客户端不会提交PORT命令并允许服务器来回连它的数据端口,而是提交 PASV命令。这样做的结果是服务器会开启一个任意的非特权端口(P > 1024),并发送PORT P命令给客户端。然后客户端发起从本地端口N+1到服务器的端口P的连接用来传送数据。
对于服务器端的防火墙来说,必须允许下面的通讯才能支持被动方式的FTP:
1. 从任何大于1024的端口到服务器的21端口 (客户端的初始化连接)
2. 服务器的21端口到任何大于1024的端口 (服务器响应到客户端的控制端口的连接)
3. 从任何大于1024端口到服务器的大于1024端口 (客户端初始化数据连接到服务器指定的任意端口)
4. 服务器的大于1024端口到远程的大于1024的端口(服务器发送ACK响应和数据到客户端的数据端口)
二、常用举例:
(注意:以下根据配置文档举出常见实例)
1.安装ftp
[root@gjp99 ~]# mkdir /mnt/cdrom
[root@gjp99 ~]# mount /dev/cdrom /mnt/cdrom
mount: block device /dev/cdrom is write-protected, mounting read-only
[root@gjp99 ~]# cd /mnt/cdrom/Server
[root@gjp99 Server]# ll vsftp*
-r--r--r-- 86 root root 143838 Jul 24 2009 vsftpd-2.0.5-16.el5.i386.rpm
[root@gjp99 Server]# rpm -qip vsftpd-2.0.5-16.el5.i386.rpm
warning: vsftpd-2.0.5-16.el5.i386.rpm: Header V3 DSA signature: NOKEY, key ID 37017186
Name : vsftpd Relocations: (not relocatable)
Version : 2.0.5 Vendor: Red Hat, Inc.
Release : 16.el5 Build Date: Wed 13 May 2009 08:47:15 PM CST
Install Date: (not installed) Build Host: hs20-bc1-2.build.redhat.com
Group : System Environment/Daemons Source RPM: vsftpd-2.0.5-16.el5.src.rpm
Size : 291690 License: GPL
Signature : DSA/SHA1, Fri 24 Jul 2009 08:34:20 PM CST, Key ID 5326810137017186
Packager : Red Hat, Inc. <http://bugzilla.redhat.com/bugzilla>
URL : http://vsftpd.beasts.org/
Summary : vsftpd - Very Secure Ftp Daemon
Description :
vsftpd is a Very Secure FTP daemon. It was written completely from
scratch.
[root@gjp99 Server]# rpm -ivh vsftpd-2.0.5-16.el5.i386.rpm
warning: vsftpd-2.0.5-16.el5.i386.rpm: Header V3 DSA signature: NOKEY, key ID 37017186
Preparing... ################################# [100%]
1:vsftpd ################################# [100%]
[root@gjp99 Server]# rpm -ql vsftpd |less
/etc/pam.d/vsftpd 可插拔验证模块
/etc/rc.d/init.d/vsftpd 控制脚本
/etc/vsftpd/vsftpd.conf 主配置文档
/var/ftp 匿名账号的默认目录
/var/ftp/pub
[root@gjp99 Server]# man 5 vsftpd.conf 配置手册
[root@gjp99 Server]# service vsftpd start
Starting vsftpd for vsftpd: [ OK ]
[root@gjp99 Server]# chkconfig vsftpd on 开机启动
2. 关于账号的详细配置
2.1.匿名账号:
无需输入用户名和口令! 用户名:anonymous 密码:回车或者邮箱账号
支持匿名账号:配置文档
[root@gjp99 ~]# vim /etc/vsftpd/vsftpd.conf
12 anonymous_enable=YES

2.2 本地账号:
有一定的危害性, 存放在:/etc/passwd /etc/shadow
14 # Uncomment this to allow local users to log in.
15 local_enable=YES
[root@gjp99 ~]# useradd gjp1
[root@gjp99 ~]# passwd gjp1
Changing password for user gjp1.
New UNIX password:
BAD PASSWORD: it is WAY too short
Retype new UNIX password:
passwd: all authentication tokens updated successfully.
[root@gjp99 ~]# cd /home/gjp1
[root@gjp99 gjp1]# ll
total 0
[root@gjp99 gjp1]# echo "welcome to access me " >>index.html
[root@gjp99 gjp1]# ll
total 4
-rw-r--r-- 1 root root 22 Aug 3 14:36 index.html


2.3 用户通过网络访问资源,
网络权限[ftp http] 本地权限[相当于windows下的ntfs]
网络权限与本地权限 如果相同 ,则相同,如果不同,则选择最小的!
![]() 网络权限可写
网络权限可写
如果本地权限也可写,则访问时可写!
[root@gjp99 home]# ll
total 4
drwx------ 3 gjp1 gjp1 4096 Aug 3 15:00 gjp1

还可以删除!
2.4 屏蔽某些权限
文件的权限默认是666,目录的权限默认是777
![]() 屏蔽掉某些权限: 所有者 用户 组
屏蔽掉某些权限: 所有者 用户 组
刚才上传的文件在666的基础上屏蔽022 则结果是644,查看
[root@gjp99 gjp1]# ll
total 108
-rw-r--r-- 1 root root 22 Aug 3 14:36 index.html
-rw-r--r-- 1 gjp1 gjp1 100864 Aug 3 15:00 ??目实训2.doc
网络权限已可写,为什么匿名账号还不能上传呀?

[root@gjp99 home]# ll -d /var/ftp/pub
drwxr-xr-x 2 root root 4096 May 13 2009 /var/ftp/pub
pub文件夹的所有者及组都是root,只有管理员可写,其他用户不可写,由于网络权限与本地权限不同,所以选择范围比较小的,
2.5 上传功能
![]()
[root@gjp99 home]# service vsftpd restart
Shutting down vsftpd: [ OK ]
Starting vsftpd for vsftpd: [ OK ]
[root@gjp99 home]# ll -d /var/ftp/pub
drwxr-xr-x 2 root root 4096 May 13 2009 /var/ftp/pub
[root@gjp99 home]# chmod o+wt /var/ftp/pub 注意权限不仅加w,还加t
[root@gjp99 home]# ll -d /var/ftp/pub
drwxr-xrwt 2 root root 4096 May 13 2009 /var/ftp/pub 加t是仅有创建者能够删除文件!

改名,删除,创建文件夹都不可以了?
2.6 匿名用户可以创建文件夹
31 anon_mkdir_write_enable=YES 匿名用户创建文件夹
man 5 vsftpd.conf

32 anon_other_write_enable=YES 增加此行! //文件夹可以重命名,可以删除文件,上传

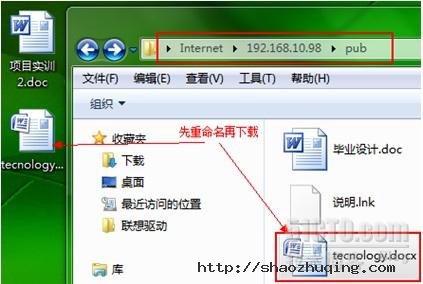
 文件却无法下载
2.7 文件如何下载?
[root@gjp99 home]# ll /var/ftp/pub //发现文件没有读取权限
[root@gjp99 home]# ll /var/ftp/pub
total 56
-rw------- 1 ftp ftp 23040 Aug 3 15:32 ??业????.doc
-rw------- 1 ftp ftp 753 Aug 3 15:47 ???.lnk
-rw------- 1 ftp ftp 24774 Aug 3 15:55 tec.docx
任意一个文件给他个读取权限测试!
[root@gjp99 home]# chmod o+r /var/ftp/pub/tec.docx 给其他用户读权限
[root@gjp99 home]# ll /var/ftp/pub
total 56
-rw------- 1 ftp ftp 23040 Aug 3 15:32 ??业????.doc
-rw------- 1 ftp ftp 753 Aug 3 15:47 ???.lnk
-rw----r-- 1 ftp ftp 24774 Aug 3 15:55 tec.docx
24 anon_umask=073 增加此行,问题简化
现在在上传点文件做测试!

[root@gjp99 home]# ll /var/ftp/pub 自动带了一个r(刚上传过来的文件)
total 256
-rw------- 1 ftp ftp 23040 Aug 3 15:32 ??业????.doc
-rw----r-- 1 ftp ftp 165835 Aug 3 16:10 guo.docx
-rw----r-- 1 ftp ftp 32272 Aug 3 16:10 ji.docx
-rw------- 1 ftp ftp 753 Aug 3 15:47 ???.lnk
-rw----r-- 1 ftp ftp 24774 Aug 3 15:55 tecnology.docx
2.8 如何备份交换机上的系统?


只支持命令行方式访问!

2.9 如何访问ftp服务器?


2.10 如何提示友好信息?
37 dirmessage_enable=YES
测试:友好提示!

2.11 如何开启ftp的日志功能?
日志文件默认目录 /var/log/却找不到!因为日志功能默认未打开!
打开日志功能:
![]()
![]()
![]()
service vsftpd restart
[root@gjp99 pub]# lftp 127.0.0.1 //无需验证就可以登录
lftp 127.0.0.1:~> dir
drwxr-xrwt 2 0 0 4096 Aug 03 08:38 pub
lftp 127.0.0.1:/> bye
[root@gjp99 pub]# ftp 127.0.0.1 // 需要用户验证
Connected to 127.0.0.1.
220 (vsFTPd 2.0.5)
530 Please login with USER and PASS.
530 Please login with USER and PASS.
KERBEROS_V4 rejected as an authentication type
Name (127.0.0.1:root): anonymous
331 Please specify the password.
Password:
[root@gjp99 pub]# ll /var/log/vsftpd.log 该日志文件已存在!
-rw------- 1 root root 0 Aug 3 16:52 /var/log/vsftpd.log
2.12 如何让日志功能生效?
查手册 man 5 vsftpd.conf

56 log_ftp_protocol=YES 增加此行
57 #
58 # Switches between logging into vsftpd_log_file and xferlog_file files.
59 # NO writes to vsftpd_log_file, YES to xferlog_file
60 xferlog_std_format=NO 日志格式禁掉

[root@gjp99 pub]# tail -f /var/log/vsftpd.log //才能使用
Fri Aug 3 09:38:52 2012 [pid 21331] CONNECT: Client "192.168.10.2"
Fri Aug 3 09:38:52 2012 [pid 21331] FTP response: Client "192.168.10.2", "220 (vsFTPd 2.0.5)"
Fri Aug 3 09:38:55 2012 [pid 21331] FTP command: Client "192.168.10.2", "USER gjp1"
Fri Aug 3 09:38:55 2012 [pid 21331] [gjp1] FTP response: Client "192.168.10.2", "331 Please specify the password."
Fri Aug 3 09:38:57 2012 [pid 21331] [gjp1] FTP command: Client "192.168.10.2", "PASS <password>"
Fri Aug 3 09:38:57 2012 [pid 21330] [gjp1] OK LOGIN: Client "192.168.10.2"
Fri Aug 3 09:38:57 2012 [pid 21332] [gjp1] FTP response: Client "192.168.10.2", "230 Login successful."
2.13 拒绝服务攻击的一种方法:
拒绝某人利用某个邮箱账号作为匿名账号的密码进行登录
[root@gjp99 ~]# ftp 127.0.0.1
Connected to 127.0.0.1.
220 (vsFTPd 2.0.5)
530 Please login with USER and PASS.
530 Please login with USER and PASS.
KERBEROS_V4 rejected as an authentication type
Name (127.0.0.1:root): anonymous
331 Please specify the password.
Password: 密码为: gjp@sina.com (即使不知道是否存在就能登录)
230 Login successful.
Remote system type is UNIX.
Using binary mode to transfer files.
ftp> dir
227 Entering Passive Mode (127,0,0,1,88,15)
150 Here comes the directory listing.
drwxr-xrwt 2 0 0 4096 Aug 03 09:11 pub
226 Directory send OK

[root@gjp99 pub]# echo gjp@sina.com >>/etc/vsftpd/banned_emails
[root@gjp99 ~]# service vsftpd restart
Shutting down vsftpd: [ OK ]
Starting vsftpd for vsftpd: [ OK ]
[root@gjp99 ~]# ftp 127.0.0.1
Connected to 127.0.0.1.
220 (vsFTPd 2.0.5)
530 Please login with USER and PASS.
530 Please login with USER and PASS.
KERBEROS_V4 rejected as an authentication type
Name (127.0.0.1:root): anonymous
331 Please specify the password.
Password:
530 Login incorrect.
Login failed.
[root@gjp99 ~]# useradd user1
[root@gjp99 ~]# passwd
Changing password for user root.
New UNIX password:
BAD PASSWORD: it is WAY too short
Retype new UNIX password:
passwd: all authentication tokens updated successfully.
[root@gjp99 ~]# ftp 127.0.0.1
Connected to 127.0.0.1.
220 (vsFTPd 2.0.5)
530 Please login with USER and PASS.
530 Please login with USER and PASS.
KERBEROS_V4 rejected as an authentication type
Name (127.0.0.1:root): user1
331 Please specify the password.
Password:
230 Login successful.
Remote system type is UNIX.
Using binary mode to transfer files.
ftp> pwd
257 "/home/user1"
ftp> cd /
250 Directory successfully changed.
ftp> dir
227 Entering Passive Mode (127,0,0,1,201,20)
150 Here comes the directory listing.
drwxr-xr-x 2 0 0 4096 Aug 03 04:05 bin
drwxr-xr-x 4 0 0 1024 Aug 02 13:26 boot
drwxr-xr-x 11 0 0 4260 Aug 03 05:42 dev
drwxr-xr-x 93 0 0 12288 Aug 03 10:06 etc
ftp> cd boot
250 Directory successfully changed.
ftp> dir
227 Entering Passive Mode (127,0,0,1,89,202)
150 Here comes the directory listing.
-rw-r--r-- 1 0 0 954947 Aug 18 2009 System.map-2.6.18-164.el5
-rw-r--r-- 1 0 0 68663 Aug 18 2009 config-2.6.18-164.el5
drwxr-xr-x 2 0 0 1024 Aug 02 13:30 grub
-rw------- 1 0 0 2601298 Aug 02 13:26 initrd-2.6.18-164.el5.img
drwx------ 2 0 0 12288 Aug 02 21:18 lost+found
-rw-r--r-- 1 0 0 107405 Aug 18 2009 symvers-2.6.18-164.el5.gz
-rw-r--r-- 1 0 0 1855956 Aug 18 2009 vmlinuz-2.6.18-164.el5
226 Directory send OK.
可以查看许多内容,而且可以下载,没有安全性!
2.14 如何提高 ftp的安全性?
[root@gjp99 ~]# vim /etc/vsftpd/vsftpd.conf

[root@gjp99 ~]# vim /etc/vsftpd/chroot_list
[root@gjp99 ~]# cat /etc/vsftpd/chroot_list
user1 //写入到该文件的账号都被禁锢了,没有写进来的可随意切换!
[root@gjp99 ~]# service vsftpd restart
Shutting down vsftpd: [ OK ]
Starting vsftpd for vsftpd: [ OK ]
[root@gjp99 ~]# su – user1 该账号下存在属于自己的东西
[user1@gjp99 ~]$ ll
total 0
[user1@gjp99 ~]$ touch gjp.txt
[user1@gjp99 ~]$ vim gjp.txt
[user1@gjp99 ~]$ ll
total 4
-rw-rw-r-- 1 user1 user1 32 Sep 26 14:40 gjp.txt
[root@gjp99 ~]# ftp 127.0.0.1
Connected to 127.0.0.1.
220 (vsFTPd 2.0.5)
530 Please login with USER and PASS.
530 Please login with USER and PASS.
KERBEROS_V4 rejected as an authentication type
Name (127.0.0.1:root): user1
331 Please specify the password.
Password:
230 Login successful.
Remote system type is UNIX.
Using binary mode to transfer files.
ftp> pwd
257 "/"
ftp> cd /
250 Directory successfully changed.
ftp> dir
227 Entering Passive Mode (127,0,0,1,119,140)
150 Here comes the directory listing.
-rw-rw-r-- 1 501 501 32 Sep 26 06:40 gjp.txt
226 Directory send OK.
ftp> bye
221 Goodbye.
[root@gjp99 ~]# useradd user2
[root@gjp99 ~]# passwd
Changing password for user root.
New UNIX password:
BAD PASSWORD: it is WAY too short
Retype new UNIX password:
passwd: all authentication tokens updated successfully.
[root@gjp99 ~]# su - user2
[user2@gjp99 ~]$ echo "user2" >> gjp2.txt
[user2@gjp99 ~]$ ll
total 4
-rw-rw-r-- 1 user2 user2 6 Sep 26 14:45 gjp2.txt
[user2@gjp99 ~]$ logout
[root@gjp99 ~]# ftp 127.0.0.1
Connected to 127.0.0.1.
220 (vsFTPd 2.0.5)
530 Please login with USER and PASS.
530 Please login with USER and PASS.
KERBEROS_V4 rejected as an authentication type
Name (127.0.0.1:root): user2
331 Please specify the password.
Password:
230 Login successful.
Remote system type is UNIX.
Using binary mode to transfer files.
ftp> pwd
257 "/home/user2"
ftp> cd /
250 Directory successfully changed.
ftp> dir
227 Entering Passive Mode (127,0,0,1,68,60)
150 Here comes the directory listing.
drwxr-xr-x 2 0 0 4096 Aug 03 04:05 bin
drwxr-xr-x 4 0 0 1024 Aug 02 13:26 boot
drwxr-xr-x 11 0 0 4220 Sep 26 06:26 dev
drwxr-xr-x 93 0 0 12288 Sep 26 06:48 etc
drwxr-xr-x 5 0 0 4096 Sep 26 06:44 home
(没有写入该文件的账号,如user2,则可以随意切换)
实现:放入该文件里的账号能够切换目录,没放进来的不能够切换目录,man 5 vsftpd.conf

[root@gjp99 ~]# vim /etc/vsftpd/vsftpd.conf
增加此功能; chroot_local_user=YES
[root@gjp99 ~]# service vsftpd restart
Shutting down vsftpd: [ OK ]
Starting vsftpd for vsftpd: [ OK ]
[root@gjp99 ~]# ftp 127.0.0.1
Connected to 127.0.0.1.
220 (vsFTPd 2.0.5)
530 Please login with USER and PASS.
530 Please login with USER and PASS.
KERBEROS_V4 rejected as an authentication type
Name (127.0.0.1:root): user1 放进去的却没有禁锢掉
331 Please specify the password.
Password:
230 Login successful.
Remote system type is UNIX.
Using binary mode to transfer files.
257 "/home/user1"
ftp> cd /
250 Directory successfully changed.
ftp> quit
221 Goodbye.
[root@gjp99 ~]# ftp 127.0.0.1
Connected to 127.0.0.1.
220 (vsFTPd 2.0.5)
530 Please login with USER and PASS.
530 Please login with USER and PASS.
KERBEROS_V4 rejected as an authentication type
Name (127.0.0.1:root): user2 没放进去的被禁锢了
331 Please specify the password.
Password:
230 Login successful.
Remote system type is UNIX.
Using binary mode to transfer files.
ftp> pwd
257 "/"
ftp> cd /
250 Directory successfully changed.
ftp> dir
227 Entering Passive Mode (127,0,0,1,98,84)
150 Here comes the directory listing.
-rw-rw-r-- 1 502 502 6 Sep 26 06:45 gjp2.txt
226 Directory send OK.
ftp 的特性:
独立进程存放在: /etc/init.c /etc/rc.d/init.d 目录下!
超级守护进程:xinetd
112 listen=YES 表明独立的,不再依赖于超级守护进程
119 pam_service_name=vsftpd //ftp支持pam验证
可参考ftp的接口文件
[root@gjp99 pam.d]# vim /etc/pam.d/vsftpd 里面有相应的系统调用及参数
[root@gjp99 pam.d]# cd /etc/vsftpd
[root@gjp99 vsftpd]# ll
total 28
-rw-r--r-- 1 root root 13 Aug 3 18:00 banned_emails
-rw-r--r-- 1 root root 7 Sep 26 14:37 chroot_list
-rw------- 1 root root 125 May 13 2009 ftpusers 存入该文件的账号不能登录ftp
-rw------- 1 root root 361 May 13 2009 user_list 存入该文件的账号不能登录ftp
-rw------- 1 root root 4640 Sep 26 14:59 vsftpd.conf
-rwxr--r-- 1 root root 338 May 13 2009 vsftpd_conf_migrate.sh
[root@gjp99 vsftpd]# cat ftpusers
# Users that are not allowed to login via ftp
root
bin
daemon
adm
lp
sync
shutdown
halt
mail
news
uucp
operator
games
nobody
user1 把user1添加进来作为测试!
[root@gjp99 vsftpd]# ftp 127.0.0.1
Connected to 127.0.0.1.
220 (vsFTPd 2.0.5)
530 Please login with USER and PASS.
530 Please login with USER and PASS.
KERBEROS_V4 rejected as an authentication type
Name (127.0.0.1:root): user1
331 Please specify the password.
Password: 需要输入密码,如果网络上有人抓包,则很不安全!
530 Login incorrect.
Login failed. 登录失败
把ftpusers中存放的账号user1删除,在user_list中输入user1测试!
[root@gjp99 vsftpd]# cat user_list
# vsftpd userlist
# If userlist_deny=NO, only allow users in this file
# If userlist_deny=YES (default), never allow users in this file, and
# do not even prompt for a password.
# Note that the default vsftpd pam config also checks /etc/vsftpd/ftpusers
# for users that are denied.
root
bin
daemon
adm
lp
sync
shutdown
halt
mail
news
uucp
operator
games
nobody
user1
[root@gjp99 vsftpd]# ftp 127.0.0.1
Connected to 127.0.0.1.
220 (vsFTPd 2.0.5)
530 Please login with USER and PASS.
530 Please login with USER and PASS.
KERBEROS_V4 rejected as an authentication type
Name (127.0.0.1:root): user1
530 Permission denied. 没有提示让输入密码,直接拒绝掉了
Login failed.
为了防止管理员的密码被捕获,则不允许管理员ftp
[root@gjp99 vsftpd]# ftp 127.0.0.1
Connected to 127.0.0.1.
220 (vsFTPd 2.0.5)
530 Please login with USER and PASS.
530 Please login with USER and PASS.
KERBEROS_V4 rejected as an authentication type
Name (127.0.0.1:root): root
530 Permission denied.
Login failed.
[root@gjp99 vsftpd]# vim user_list
# vsftpd userlist
# If userlist_deny=NO, only allow users in this file
在 /etc/vsftpd/vsftpd.conf中增加此功能: service vsftpd restart
下面测试:user1在这个文件下所以可以登录,user2不在该文件里,因此直接拒绝!
[root@gjp99 vsftpd]# ftp 127.0.0.1
Connected to 127.0.0.1.
220 (vsFTPd 2.0.5)
530 Please login with USER and PASS.
530 Please login with USER and PASS.
KERBEROS_V4 rejected as an authentication type
Name (127.0.0.1:root): user1
331 Please specify the password.
Password:
230 Login successful.
Remote system type is UNIX.
Using binary mode to transfer files.
ftp> dir
227 Entering Passive Mode (127,0,0,1,42,166)
150 Here comes the directory listing.
-rw-rw-r-- 1 501 501 32 Sep 26 06:40 gjp.txt
226 Directory send OK.
ftp> quit
221 Goodbye.
[root@gjp99 vsftpd]# ftp 127.0.0.1
Connected to 127.0.0.1.
220 (vsFTPd 2.0.5)
530 Please login with USER and PASS.
530 Please login with USER and PASS.
KERBEROS_V4 rejected as an authentication type
Name (127.0.0.1:root): user2
530 Permission denied.
Login failed.
/etc/vsftpd/vsftpd.conf 下的
122 tcp_wrappers=YES
查看某些应用支持的链接库:
[root@gjp99 vsftpd]# ldd /usr/sbin/vsftpd
linux-gate.so.1 => (0x00164000)
libssl.so.6 => /lib/libssl.so.6 (0x00a33000)
libwrap.so.0 => /lib/libwrap.so.0 (0x0067c000)
出现此文件,即说明支持tcp_wrappers=YES
需修改 /etc/hosts.allow /etc/hosts.deny
先看hosts.allow 再看hosts.deny 默认是允许的!

[root@gjp99 vsftpd]# cat /etc/hosts.allow
#
# hosts.allow This file describes the names of the hosts which are
# allowed to use the local INET services, as decided
# by the '/usr/sbin/tcpd' server.
#
vsftpd:192.168.10.2:allow 仅有192.168.10.2允许
[root@gjp99 vsftpd]# vim /etc/hosts.deny
[root@gjp99 vsftpd]# cat /etc/hosts.deny
#
# hosts.deny This file describes the names of the hosts which are
# *not* allowed to use the local INET services, as decided
# by the '/usr/sbin/tcpd' server.
#
# The portmap line is redundant, but it is left to remind you that
# the new secure portmap uses hosts.deny and hosts.allow. In particular
# you should know that NFS uses portmap!
vsftpd:all :deny 其他人拒绝
测试:windows下ftp

linux 下测试:
[root@gjp99 vsftpd]# ftp 127.0.0.1
Connected to 127.0.0.1.
421 Service not available.
ftp> quit
只有192.168.10.2不可以,其他的都可以!
[root@gjp99 vsftpd]# vim /etc/hosts.allow 只在该文件下操作,hosts.deny 空着
6 vsftpd:192.168.10.2:deny
7 vsftpd:all:allow
测试:windows下:

linux下:
[root@gjp99 vsftpd]# ftp 127.0.0.1
Connected to 127.0.0.1.
220 (vsFTPd 2.0.5)
530 Please login with USER and PASS.
530 Please login with USER and PASS.
KERBEROS_V4 rejected as an authentication type
Name (127.0.0.1:root): user1
331 Please specify the password.
Password:
230 Login successful.
Remote system type is UNIX.
Using binary mode to transfer files.
ftp> dir
227 Entering Passive Mode (127,0,0,1,208,223)
150 Here comes the directory listing.
-rw-rw-r-- 1 501 501 32 Sep 26 06:40 gjp.txt
226 Directory send OK.
ftp> quit
ftp的安全性
1. 协议 ftp 明文
2. 账号 匿名 本地账号(抓包,危险性较大) 最好选用虚拟账号
删除原有的安全特性,安装tshark
挂载光盘,安装抓包工具:
[root@gjp99 vsftpd]# mount /dev/cdrom /mnt/cdrom
mount: block device /dev/cdrom is write-protected, mounting read-only
[root@gjp99 vsftpd]# cd /mnt/cdrom/Server/
[root@gjp99 Server]# ll wireshark-*
-r--r--r-- 220 root root 11130359 Jun 11 2009 wireshark-1.0.8-1.el5_3.1.i386.rpm
-r--r--r-- 220 root root 686650 Jun 11 2009 wireshark-gnome-1.0.8-1.el5_3.1.i386.rpm
[root@gjp99 Server]# rpm -ivh libsmi-0.4.5-2.el5.i386.rpm 必须先安装此软件
warning: libsmi-0.4.5-2.el5.i386.rpm: Header V3 DSA signature: NOKEY, key ID 37017186
Preparing... ################################# [100%]
1:libsmi ################################# [100%]
[root@gjp99 Server]# rpm -ivh wire
wireless-tools-28-2.el5.i386.rpm
wireless-tools-devel-28-2.el5.i386.rpm
wireshark-1.0.8-1.el5_3.1.i386.rpm
wireshark-gnome-1.0.8-1.el5_3.1.i386.rpm
[root@gjp99 Server]# rpm -ivh wireshark-1.0.8-1.el5_3.1.i386.rpm
warning: wireshark-1.0.8-1.el5_3.1.i386.rpm: Header V3 DSA signature: NOKEY, key ID 37017186
Preparing... ################################# [100%]
1:wireshark ############################### [100%]
[root@gjp99 Server]# tshark -ni eth0 -R "tcp.dstport eq 21 "
Running as user "root" and group "root". This could be dangerous.
Capturing on eth0 已经在eth0上可以抓包了~
Xshell:\> ftp 192.168.10.98
Connecting to 192.168.10.98:21...
Connection established.
Escape character is '^@]'.
220 (vsFTPd 2.0.5)
Name (192.168.10.98:Administrator): user1
331 Please specify the password.
Password:
230 Login successful.
ftp:/home/user1>
抓包抓到的情况:
115.297511 192.168.10.2 -> 192.168.10.98 FTP Request: USER user1 用户名
115.497920 192.168.10.2 -> 192.168.10.98 TCP 53368 > 21 [ACK] Seq=13 Ack=55 Win=65536 Len=0
116.968029 192.168.10.2 -> 192.168.10.98 FTP Request: PASS 123 密码
116.996447 192.168.10.2 -> 192.168.10.98 FTP Request: PWD
117.196785 192.168.10.2 -> 192.168.10.98 TCP 53368 > 21 [ACK] Seq=28 Ack=97 Win=65536 Len=0
测试,是否能抓到管理员密码?
Xshell:\> ftp 192.168.10.98
Connecting to 192.168.10.98:21...
Connection established.
Escape character is '^@]'.
220 (vsFTPd 2.0.5)
Name (192.168.10.98:Administrator): root
530 Permission denied.
抓包抓不到密码:
243.383605 192.168.10.2 -> 192.168.10.98 FTP Request: USER root
243.583142 192.168.10.2 -> 192.168.10.98 TCP 53369 > 21 [ACK] Seq=12 Ack=45 Win=65536 Len=0
291.498211 192.168.10.2 -> 192.168.10.98 FTP Request: PWD
291.698623 192.168.10.2 -> 192.168.10.98 TCP 53368 > 21 [ACK] Seq=43 Ack=154 Win=65536 Len=0
ftps的搭建:
ftps=ftp+ssl
创建CA
[root@gjp99 Server]# cd /etc/pki
[root@gjp99 pki]# ll
total 32
drwx------ 3 root root 4096 Aug 2 21:22 CA
drwxr-xr-x 2 root root 4096 Aug 2 21:20 nssdb
drwxr-xr-x 2 root root 4096 Aug 2 21:21 rpm-gpg
drwxr-xr-x 5 root root 4096 Aug 2 21:22 tls
[root@gjp99 pki]# vim tls/openssl.cnf
45 dir = /etc/pki/CA # Where everything is kept
46 certs = $dir/certs # Where the issued certs are kept
47 crl_dir = $dir/crl # Where the issued crl are kept
48 database = $dir/index.txt # database index file.
49 #unique_subject = no # Set to 'no' to allow creation of
50 # several ctificates with same subject.
51 new_certs_dir = $dir/newcerts # default place for new certs.
52
53 certificate = $dir/cacert.pem # The CA certificate
54 serial = $dir/serial # The current serial number
55 crlnumber = $dir/crlnumber # the current crl number
56 # must be commented out to leave a V1 CRL
57 crl = $dir/crl.pem # The current CRL
58 private_key = $dir/private/cakey.pem# The private key
底行模式:![]()
88 countryName = optonal
89 stateOrProvinceName = optonal
90 organizationName = optonal

[root@gjp99 pki]# ll
total 32
drwx------ 3 root root 4096 Aug 2 21:22 CA
drwxr-xr-x 2 root root 4096 Aug 2 21:20 nssdb
drwxr-xr-x 2 root root 4096 Aug 2 21:21 rpm-gpg
drwxr-xr-x 5 root root 4096 Sep 26 17:04 tls
[root@gjp99 pki]# cd CA
[root@gjp99 CA]# ll
total 8
drwx------ 2 root root 4096 Jun 30 2009 private
[root@gjp99 CA]# mkdir crl certs newcerts
[root@gjp99 CA]# touch index.txt serial
[root@gjp99 CA]# echo "01">serial
[root@gjp99 CA]# openssl genrsa 1024 >private/cakey.pem
Generating RSA private key, 1024 bit long modulus
....++++++
......++++++
e is 65537 (0x10001)
[root@gjp99 CA]# chmod 600 private/*
[root@gjp99 CA]# openssl req -new -key private/cakey.pem -x509 -out cacert.pem
You are about to be asked to enter information that will be incorporated
into your certificate request.
What you are about to enter is what is called a Distinguished Name or a DN.
There are quite a few fields but you can leave some blank
For some fields there will be a default value,
If you enter '.', the field will be left blank.
-----
Country Name (2 letter code) [CN]:
State or Province Name (full name) [Shang Hai]:
Locality Name (eg, city) [Shang Hai]:
Organization Name (eg, company) [My Company Ltd]:sec center
Organizational Unit Name (eg, section) []:tec
Common Name (eg, your name or your server's hostname) []:ca.net.net
Email Address []:
私钥 请求文件 证书
[root@gjp99 CA]# mkdir /etc/vsftpd/certs
[root@gjp99 CA]# cd /etc/vsftpd/certs/
[root@gjp99 certs]# openssl genrsa 1024 >vsftpd.key 创建钥匙
Generating RSA private key, 1024 bit long modulus
.......++++++
................................................................+++
e is 65537 (0x10001)
[root@gjp99 certs]# openssl req -new -key vsftpd.key -out vsftpd.csr 产生请求
You are about to be asked to enter information that will be inco
into your certificate request.
What you are about to enter is what is called a Distinguished Na
There are quite a few fields but you can leave some blank
For some fields there will be a default value,
If you enter '.', the field will be left blank.
-----
Country Name (2 letter code) [CN]:
State or Province Name (full name) [Shang Hai]:
Locality Name (eg, city) [Shang Hai]:
Organization Name (eg, company) [My Company Ltd]:bht
Organizational Unit Name (eg, section) []:tec
Common Name (eg, your name or your server's hostname) []:ftp.bht.com
Email Address []:
Please enter the following 'extra' attributes
to be sent with your certificate request
A challenge password []:
An optional company name []:
[root@gjp99 certs]# ll
total 8
-rw-r--r-- 1 root root 651 Sep 26 17:17 vsftpd.csr
-rw-r--r-- 1 root root 887 Sep 26 17:15 vsftpd.key
[root@gjp99 certs]# openssl ca -in vsftpd.csr -out vsftpd.cert 生成证书
Using configuration from /etc/pki/tls/openssl.cnf
Check that the request matches the signature
Signature ok
Certificate Details:
Serial Number: 1 (0x1)
Validity
Not Before: Sep 26 09:35:33 2012 GMT
Not After : Sep 26 09:35:33 2013 GMT
Subject:
countryName = CN
stateOrProvinceName = Shang Hai
organizationName = bht
organizationalUnitName = tec
commonName = ftp.bht.com
X509v3 extensions:
X509v3 Basic Constraints:
CA:FALSE
Netscape Comment:
OpenSSL Generated Certificate
X509v3 Subject Key Identifier:
4E:10:2C:A8:BA:A8:5E:16:D1:8E:BD:85:53:87:5C:5E:1D:B6:04:C1
X509v3 Authority Key Identifier:
keyid:DF:8C:0F:8C:D0:65:31:42:FB:AF:29:7A:52:51:4C:86:09:25:91:F4
Certificate is to be certified until Sep 26 09:35:33 2013 GMT (365 days)
Sign the certificate? [y/n]:y
1 out of 1 certificate requests certified, commit? [y/n]y
Write out database with 1 new entries
Data Base Updated
证书在哪?私钥在哪?
用man 5 vsftpd.conf
[root@gjp99 certs]# vim /etc/vsftpd/vsftpd.conf
增加以下功能:
rsa_cert_file=/etc/vsftpd/certs/vsftpd.cert
rsa_private_key_file=/etc/vsftpd/certs/vsftpd.key
ssl_tlsv1=YES
ssl_sslv3=YES
ssl_sslv2=YES
ssl_enable=YES
force_local_logins_ssl=YES
force_local_data_ssl=YES
[root@gjp99 certs]# service vsftpd restart
Shutting down vsftpd: [ OK ]
Starting vsftpd for vsftpd: [ OK ]
[root@gjp99 certs]# tshark -ni eth0 -R "tcp.dstport eq 21 "
Running as user "root" and group "root". This could be dangerous.
Capturing on eth0
C:\Users\Administrator>ftp 192.168.10.98 命令行下无法登录(由于使用了身份验证)
连接到 192.168.10.98。
220 (vsFTPd 2.0.5)
用户(192.168.10.98:(none)): user1
530 Non-anonymous sessions must use encryption.
登录失败。
使用客户端软件:


点击应用 点击连接!

点击 “接受一次”

1331.140451 192.168.10.2 -> 192.168.10.98 FTP Request: AUTH SSL
1331.147508 192.168.10.2 -> 192.168.10.98 FTP Request: \200\310\001\003\001\000
下面都是已加密的信息,已看不到密码!
浅谈围绕业务和资源的成熟度,设计团队和项目管理模型
房如华: 从五人到五十人:浅谈围绕业务和资源的成熟度,设计团队和项目管理模型
如何度量研发和项目管理模型是否良好的支持了业务发展?
互联网的产品植根于高度充分竞争的土壤中,对外界环境的变化是非常敏感的,我们不能保证时刻都做正确的事,因为正确是相对的。在传统软件行业里,通常软件会被交付给明确的客户群体,那么软件的品质只与是否满足了客户需求,以及与同类产品的相对优势有关。而一款互联网产品,在出生之日起,就面临着用户的不确定性,用户需求迁移的不确定及复杂性,竞品可能来自多个领域等因素,我们唯一能够确定的就是变化本身。
研发和项目的管理模型,实际上就是团队的能力成熟度模型。我们既不能在缺人的时候才开始招人、培养人,也不能在业务尚未成熟时招到无法施展拳脚的专家,同时还要确认团队中的大多数同学的潜力能够跟随业务一起成长,否则团队在早期的波动会严重影响甚至毁灭整个业务的进程。因此,业务的成熟度与团队的能力成熟度是呈双螺旋不断迭代的,两者不能产生较大的偏差。
评估两者是否匹配的标准,我认为主要有以下两点:
- 敏捷性:能够控制从“决定做某种修改”到“该修改结果正式上线”的这段时间,也叫做周期时间(cycle time)
- 灵活性:只有当能够控制每一次从引入变更到发布的整个过程时,你才能开始优化和改进软件交付的速度和质量。
下面,为了简化表述,我们把业务和团队的成熟度分为四个阶段,每个阶段有其自身的特点和面临的挑战,接受并克服了这些挑战,团队将变得更为强大。
0-5人:挖下成功的第一锹泥土
当你想办法向你的老板或者投资人讲完一个美妙的故事之后,你就拥有资源了,这时你需要的是招募(确切的说是说服)一个能够把事情做起来的初始团队,也许一开始只有5个人,但不要紧,明确好从0到1的目标,马上开始工作吧。
这一步通常是用最小的抛弃成本来验证目标、团队的可行性。你要想办法在团队没有产生自我怀疑之前,把事情尽快做成。此时,应遵循INVEST原则,即独立的(Independent)、可协商的(Negotiable)、有价值的(Valuable)、可估计的(Estimable)、小的(Small)并且可测试的(Testable)。
对于这5个人,角色分工很简单,你是项目经理,其他成员都是研发人员,一切资源面向把事情做成。沟通方式是次要的,大家坐在一起,早期不会有太大的沟通障碍。此时人员的单点不是最大的风险,没人测试也不是最大的风险,因为很多项目没等第一个Demo做出来就已经失败了。
但不关心沟通不代表工具是次要的。好的工具可以极大的提高工作的效率,例如代码控制、Wiki这些基本的工具还是要使用的,而且等团队成型之后,容易成为团队文化基因的一部分。
这个阶段对团队的技能和经验也提出了一些必要的挑战:
- 需要有解决问题能力很强的人,在项目因各种原因停滞的时候需要有人站出来解决;
- 需要有较强项目过程管理能力的人,在优先级、项目品质等方面受资源影响需要调整计划时,要能基于不全面的信息做出合理的决定。
- 要从一开始就让团队养成持续交付的习惯。持续交付就是要形成需求、开发、测试、部署的流水线。对于早期团队来说,就要想办法让部署的工作流水线化。首先,版本控制是必要的,它能够保证随时checkout一个版本用于上线,并且随时回滚;其次,配置管理也是必要的,方便我们基于部署环境编写不同的配置文件;最后,部署的变更管理也是重要的,而且需要尽可能的自动化,为什么要自动化?因为早期你的产品很显然会出现大量的缺陷,你唯一能做到的就是把缺陷在代码里修复之后,以秒级的速度发布到线上。目前国内有很多初始成本低廉的公有云产品可以使用,通过写一些简单的脚本,可以把程序和配置快速发布到一个高可用的环境中。
5-20人:踌躇满志,更快的奔跑
初始的业务模式得到验证,团队活下来了,可以沿着预计的大方向前进了,这时候,终于可以把之前的Demo细化了,因为Demo只是跑通了流程,但此时产品可能连可用性还谈不上呢。
你招来了一名产品经理,他开始兴致勃勃的编制未来半年,甚至一年的路线图。假设能够完成这些需求,并保证品质,那么前途是一片光明,并有望领先大部分竞争对手。
这时,作为项目负责人的你,欣慰的发现产品经理在大多数方面和你的业务见解是一致的,因为都提出了大量不得不做的需求,我们确实辜负了用户太多的期待,但你突然意识到一个更关键的问题,完成这些的资源远远不够!
要开始做取舍了,你知道在这个冗长的列表里,永远存在“更有价值“的需求。
好的,列一个Excel,我们开始排个序。
判断优先级的标准是什么?很简单,做两个极端的假设,一个是:哪个需求不做会死人?另一个是:哪个需求带来的预期收益更大?
可能有的需求需要加三个月的班才能完成呢,浪费了时间,贻误战机怎么办?其实不用担心,先把可用性做好,再找你的目标用户群体不晚,在此之前,患得患失是无意义的。
与其患得患失,不如多花点开发量,做点更“精益”的事吧。比如通过小范围的用户测试、灰度发布等方法,快速验证产品的可用性,使用尽可能多的用户行为分析软件来评估你的用户按照你的预期使用了功能并且留存下来。这样万一你先前的决定是错误的,你也可以用较小的抛弃成本来调整方向,少留些遗憾给未来。
努力奔跑的日子总是充满期待的,但你也经常会从资深的员工嘴里听到些许纠结:“我是不是该重构了?”先重构后开发总是没坏处的,这正是素养优秀的表现。然而此时你仍需要帮助他们进行取舍,合理的留下一些技术负债。
如何判断要留下哪些负债呢?
负债产生利息吗?也就是未来团队和业务复杂度不断增加的情况下,是否会让技术问题的影响范围扩大,或是优化成本不断升高直至失控?如果负债会产生短期的利息,那么把精力花在减少利息和让业务加速奔跑相比,哪个更合算?
当前的负债,能够通过后期招募一名专业、资深的成员,用更少的时间、更好的经验或者更成熟的组件来一次性解决它吗?
如果某个业务模块的需求变化本身是频繁的,那么此处产生的负债也是不确定的,刻舟求剑的优化之后,发现需求已经变化了,也是一种浪费。
在这个阶段,因为引入了制定需求和跟踪缺陷的角色—产品经理,所以需要使用工具来对需求和确信进行追踪,一个类似Bugzilla的开源缺陷跟踪软件就能满足你大部分的需求了。
20-35人:总体产出随人数增加减缓,团队能力出现瓶颈
你的团队成型了,80%的成员都是工程师,他们努力的实现着一个一个小的目标,照此速度运转下去,似乎你脑海中的那个路线图就要实现了!
“继续招人吧!多一倍的资源投入就能换来多一倍的回报,因为他们负责的业务模块是不同的,不会产生沟通上的麻烦。”
观点听起来很有道理,但实际是错误的,你的团队毕竟不是流水线上的组装工人,更何况,随着事情越来越复杂,沟通的交集是不可避免的。这就好比一片森林,地表以上的树干都是笔直挺拔,互不影响,但地表以下的树根已不可避免的盘根错节在一起,更可怕的是,没人能完整的掌握这种交集的状态,更不要提如何改进了。于是,一辆战车抛锚了,而看起来任何人都没做错什么。
瓶颈到来了。
我们知道在早期的网络通信技术里有一个名词叫做“广播风暴”,指的是在集线器组成的共享网络下,所有用户的实际可用带宽,随用户数的增加而递减,并且在争抢信道的时候产生用户的等待。
这是不是很像目前你的未被治理的早期团队遇到的情况?为了确保每个人都得到足够的信息,全员会议在增加,人数越多,会议议程越复杂导致沟通成本的进一步增加,这还不包括团队成员随时被打断、叫到某个会议中的情况。
集线器最终被交换机和路由器彻底的取代了。随着团队增长,也需要主动革新现有的成员之间的沟通协作方式。
沟通的本质是解决信息传递问题,让信息的生产者能够尽快抵达必要的受众。但自发的信息传递并不保证效率,也不保证可达,所以需要一个协调员来优化沟通的效率,当然协调员就不能总是组织全体会议了。
- 必要的信息,还是要广播出去,提到Dashboard的概念,Dashboard是团队成员需要得到的信息的最小子集,通过这些信息,团队成员能够基于自身角色和目标的考量,迅速开展后续行动。如何让Dashboard的变更成本最小化?就必须协作了,一开始这种协作是痛苦的,因为并没有流程来保证不同角色间信息传递是一致的,所以只好让团队中的每个角色的关键成员都来更新Dashboard,刚开始会出现大量的信息不完善、不一致甚至自相矛盾的情况,但不要怕,频繁的去做,坚持两三周,情况一定会好转,管理就是不断重复,把主观上想做好变为真正有能力做好的过程。
- 局部的信息传递给团队中局部的群体,该如何来操作呢?如果你的团队中有几个人具备项目经验和较强的责任心,还是可以通过定期的会议和不定期的沟通来解决的,但你一定觉得在这个阶段投入专职的项目管理或流程优化的人员还是过于奢侈了,那么不要紧,充分利用好工作流这个IT界的伟大发明吧。工作流能够让你的团队根据一系列预先设定好的过程规则,将文档、信息、任务在不同的执行者之间进行传递与执行,避免人工的方式造成的低效、等待和错误。可以考虑购买Atlassian的Jira软件,这可能是你的第一笔软件投资了,或许觉得有些昂贵,但这一定比你招募一个专职的员工便宜多了。
- 加强团队不同角色对信息中“一致”的部分的约定,例如版本,版本用于识别一篇文档、一份代码的各个时间点的历史快照,不同角色的成员基于对版本的一致命名,可以有效的识别需求、实现、部署工作之间的对应关系。
35-50人:重装上阵,提高整体交付品质和团队成熟度
你拖着沉重的身躯,靠一己之力把团队带到了一个执行力和结果都还不错的状态,终于可以停下来歇一歇了。
这是大多数业务负责人梦寐以求的状态,但要想从同行中杀出血路,保持进一步的竞争优势,这还不够完美。
你望着窗外鳞次栉比的建筑物,发现大多数二三十层的楼房并没有什么不同,但鹤立鸡群的几幢摩天大楼,让你意识到,一定有一些工作是只有某些人才能完成的,而当你的进取心激发你要建造摩天大楼的时候,你也需要他们。这就是专家的价值。
如果你想停止修修补补的民工游击队的日子,就在这个时候引入专家团队,来让团队变得更加高大上吧。
专家能扮演怎样的角色,取决于你需要他们发挥怎样的作用,每位专家都有自己擅长的工作模式,你需要了解他们的工作偏好,以帮助你改善团队的能力基因。
- 架构师:具备一定的理论高度,并在相当规模的环境下,成功的完成过研发或管理能力的升级。他倾向于了解到具体情况后去务实的推进解决问题,并怀着积极和包容的沟通心态获取团队的支持。这种工作模式的优势是目标明确,执行有力;劣势是可能过程中需要调用较多的资源,会与业务线的资源调配产生优先级上的冲突。
- 咨询师:他不是最主动或者最敏感解决问题的人,也许平常他只是收到各个项目组抄送给他的邮件,但遇到紧急情况时,能够快速亲自解决,或者叫上其他同学一起会诊,对于可能会重复出现的问题,或者重复产生的工作量,会设法通过优化流程来降低内部消耗。这种工作模式的优势是面向问题持续迭代团队,确保短期的成果总是可被衡量的;劣势是受团队现有成员的视野的限制较大,总是踩过坑后才能促使团队意识到问题并统一思想。
此外,还要使用IT管理的思想来提高团队的流程成熟度和专业度,从而提高整体交付品质。
互联网的商业化只经历了短短的不到二十年的时间,但在此之前,IT的信息化就已经在国外很多企业中普及开来了,企业中的大部分员工是使用IT设备作为生产力工具和协作沟通的渠道,那么如何支持好IT基础设施就变成了很重要的工作,并由此催生了IT服务管理的概念,在20世纪80年代末期,还由英国政府部门发起制订了一个信息技术基础架构库即ITIL,到目前已修订至第3版,从流程的规范制订,发展为面向全生命周期的服务管理。
虽然前面反复提到:互联网与IT企业对于需求的管理存在相当大的差异,但这只会促使我们思考如何吸取面向交付品质的ITIL的理念,并在此基础上让一切环节运转在一条流水线上,并想方设法让流水线变得更快。
让流水线变的更快,可以从两个角度进行优化,一个是提高效率,一个是减少损耗。工具的高度自动化,把尽可能多的事情交给机器去做是提高效率的最显而易见的方法。那么减少损耗呢?通常因为测试资源、环境复杂性等问题,导致原本在测试环境运转正常的软件,在服务器或者用户的手机上出现了问题,你几乎没有办法在生产运行环境下远程调试和修改程序,但这些问题又无法复现,所以捕获现场就变成了非常重要的事。日志和监控是经无数团队和项目证明的最重要的两种捕获现场、衡量线上交付品质的方式,所以在你的团队有允许的资源时,一定要有专人面向其进行持续的分析、优化和质量评价。
总结
- 在业务还比较小的时候,要面向成功率最大化进行团队资源配置,随着业务的逐步发展,资源配置的原则要逐步倾斜至执行效率、交付品质,直至从理论的高度设计相应的流程和角色来固化你的团队,使之变得优质、高效、稳定、可控。
- 充分利用工具,尽可能将一切工作自动化。
- 重复、频繁的做一件事,尤其是你发现这件事情既重要又困难的时候。
- 在你的团队没有强大到能够筑巢引凤的时候,不用花精力弥补技能的短板,因为成功率低,回报也有限,反而对团队的项目管理要亲力亲为,识别损耗并推动改进。
支持博主

关于邵珠庆博客
文章标签
记事邵珠庆博客
最近文章
最近评论
- 发表在《中国翻墙网民状况调查》
- 发表在《教你如何简单获取新浪微博短地址接口》
- 发表在《教你如何简单获取新浪微博短地址接口》
- 发表在《教你如何简单获取新浪微博短地址接口》
- 发表在《教你如何简单获取新浪微博短地址接口》
博客日历
目录分类
文章归档
- 2025年8月 (2)
- 2022年9月 (1)
- 2022年8月 (3)
- 2022年7月 (1)
- 2022年3月 (1)
- 2021年10月 (3)
- 2021年1月 (1)
- 2020年4月 (3)
- 2020年3月 (3)
- 2020年2月 (2)
- 2020年1月 (3)
- 2019年12月 (2)
- 2019年11月 (3)
- 2019年10月 (2)
- 2019年9月 (2)
- 2019年8月 (4)
- 2019年7月 (2)
- 2019年6月 (2)
- 2019年5月 (2)
- 2019年4月 (3)
- 2019年3月 (2)
- 2019年2月 (3)
- 2019年1月 (2)
- 2018年12月 (2)
- 2018年11月 (2)
- 2018年10月 (3)
- 2018年9月 (2)
- 2018年8月 (2)
- 2018年7月 (1)
- 2018年6月 (2)
- 2018年5月 (3)
- 2018年4月 (2)
- 2018年3月 (6)
- 2018年2月 (7)
- 2018年1月 (3)
- 2017年11月 (2)
- 2017年10月 (2)
- 2017年9月 (5)
- 2017年8月 (4)
- 2017年7月 (8)
- 2017年6月 (5)
- 2017年5月 (14)
- 2017年4月 (8)
- 2017年3月 (5)
- 2017年2月 (2)
- 2017年1月 (1)
- 2016年12月 (1)
- 2016年11月 (5)
- 2016年10月 (3)
- 2016年9月 (2)
- 2016年8月 (1)
- 2016年7月 (2)
- 2016年6月 (2)
- 2016年5月 (5)
- 2016年4月 (5)
- 2016年3月 (2)
- 2016年2月 (1)
- 2016年1月 (2)
- 2015年12月 (2)
- 2015年11月 (1)
- 2015年10月 (3)
- 2015年9月 (2)
- 2015年8月 (4)
- 2015年7月 (5)
- 2015年6月 (6)
- 2015年5月 (3)
- 2015年4月 (8)
- 2015年3月 (6)
- 2015年2月 (4)
- 2015年1月 (5)
- 2014年12月 (2)
- 2014年11月 (5)
- 2014年10月 (5)
- 2014年9月 (1)
- 2014年8月 (2)
- 2014年7月 (4)
- 2014年6月 (1)
- 2014年5月 (9)
- 2014年4月 (5)
- 2014年3月 (1)
- 2014年2月 (1)
- 2014年1月 (5)
- 2013年12月 (4)
- 2013年11月 (12)
- 2013年10月 (6)
- 2013年9月 (7)
- 2013年8月 (8)
- 2013年7月 (15)
- 2013年6月 (9)
- 2013年5月 (12)
- 2013年4月 (8)
- 2013年3月 (11)
- 2013年2月 (9)
- 2013年1月 (21)
- 2012年12月 (8)
- 2012年11月 (7)
- 2012年10月 (19)
- 2012年9月 (16)
- 2012年8月 (13)
- 2012年7月 (10)
- 2012年6月 (11)
- 2012年5月 (11)
- 2012年4月 (8)
- 2012年3月 (8)
- 2012年2月 (11)
- 2012年1月 (8)
- 2011年12月 (18)
- 2011年11月 (32)
- 2011年10月 (17)
- 2011年9月 (18)
- 2011年8月 (11)
- 2011年7月 (55)
- 2011年6月 (1)
- 2011年5月 (4)
- 2011年4月 (2)
- 2011年3月 (1)
- 2011年1月 (3)
- 2010年12月 (1)
- 2010年11月 (6)
- 2010年9月 (5)
- 2010年8月 (2)
- 2010年7月 (3)
- 2010年6月 (7)
- 2010年5月 (3)
- 2010年4月 (4)
- 2010年3月 (8)
- 2010年2月 (2)
- 2010年1月 (2)
- 2009年12月 (2)
- 2009年11月 (1)
- 2009年10月 (1)
- 2009年8月 (1)
- 2009年7月 (2)
- 2009年5月 (1)
- 2009年4月 (1)
- 2009年3月 (1)
- 2009年2月 (1)
- 2009年1月 (1)
- 2008年12月 (1)
- 2008年11月 (2)
- 2008年10月 (1)
- 2008年8月 (5)
- 2008年7月 (2)
- 2008年6月 (1)
- 2008年5月 (3)
- 2008年4月 (11)
- 2008年3月 (1)
- 2008年2月 (1)
- 2008年1月 (1)
- 2007年12月 (1)
- 2007年11月 (3)
- 2007年10月 (1)
- 2007年9月 (1)
- 2007年8月 (1)
- 2007年7月 (1)
- 2007年6月 (1)
- 2007年5月 (1)
博客功能
京东好物
